
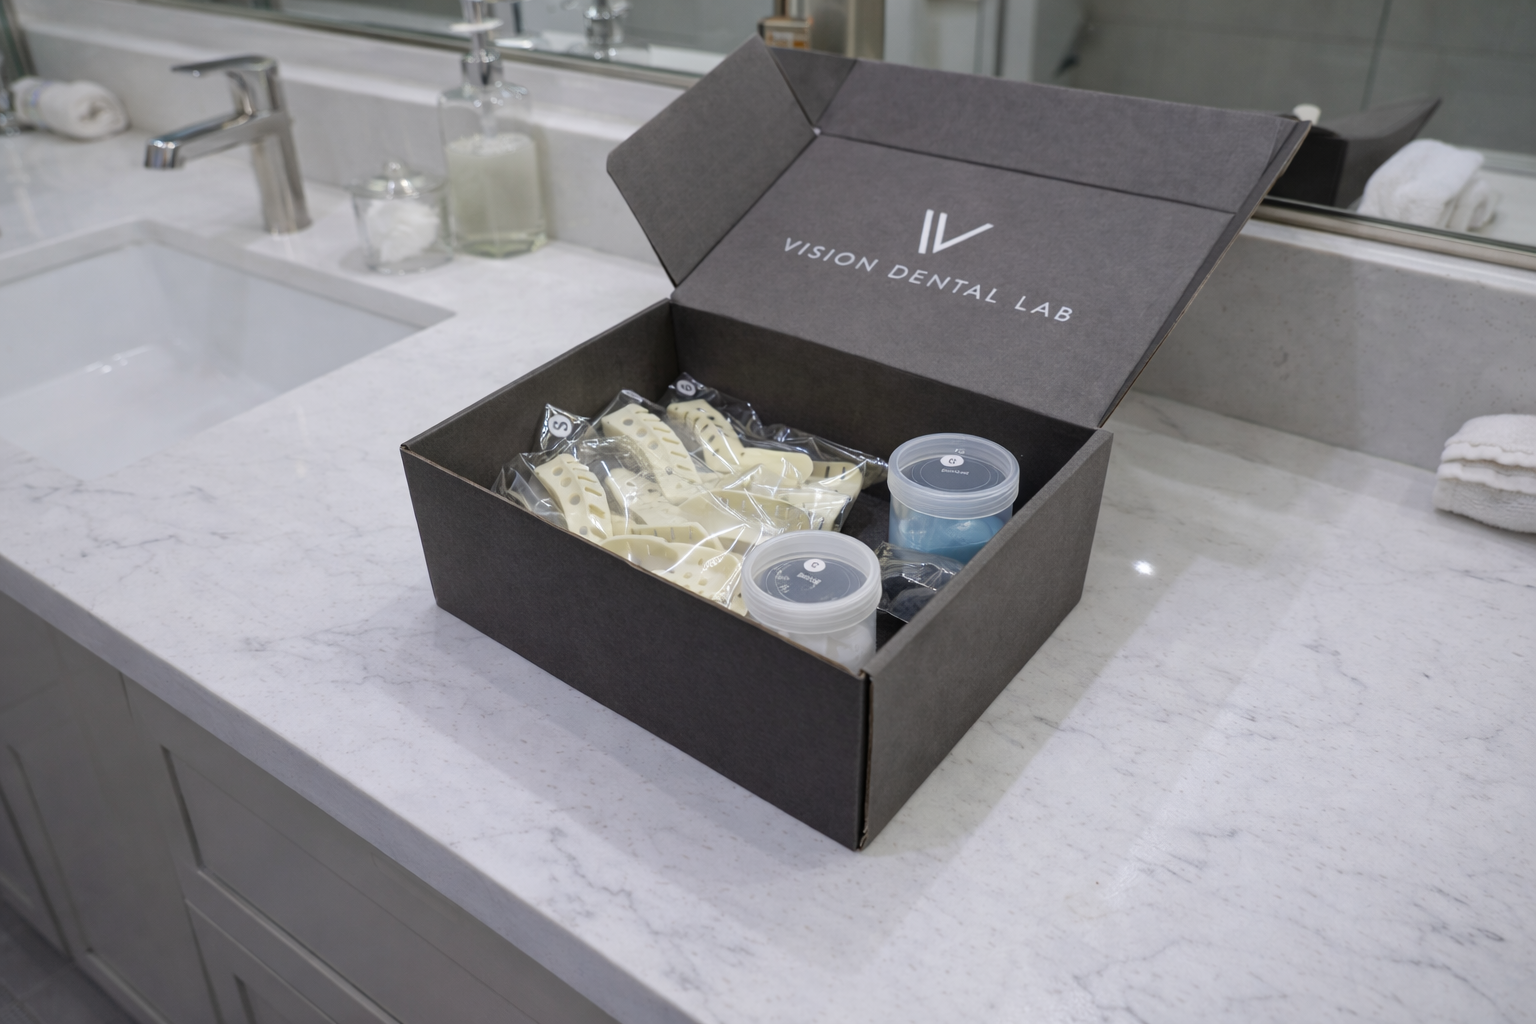
Our Impression Kits
This page provides step-by-step instructions and helpful guidance for using our at-home dental impression kits, including what’s included in your kit and how to complete your impression accurately and confidently.
What’s Included in Your Impression Kit
Each at-home impression kit includes everything needed to complete your impressions and return them to our lab:
Upper and Lower impression trays in Small, Medium, and Large
Latex-free gloves, selected based on your quiz preferences
Impression material (base and catalyst) for 4 attempts
Printed step-by-step instructions
Floss pick for comfort and tray removal
Clear return baggie for your completed impressions
Pre-paid return shipping label

Watch the Full Impression Tutorial
Spanish Version
STEP-BY-STEP INSTRUCTIONS
Step 1 — Set Up Your Space
Wash your hands, lay out all kit contents on a clean surface, and put on the included latex-free gloves.
Step 2 — Choose the Best-Fitting Tray
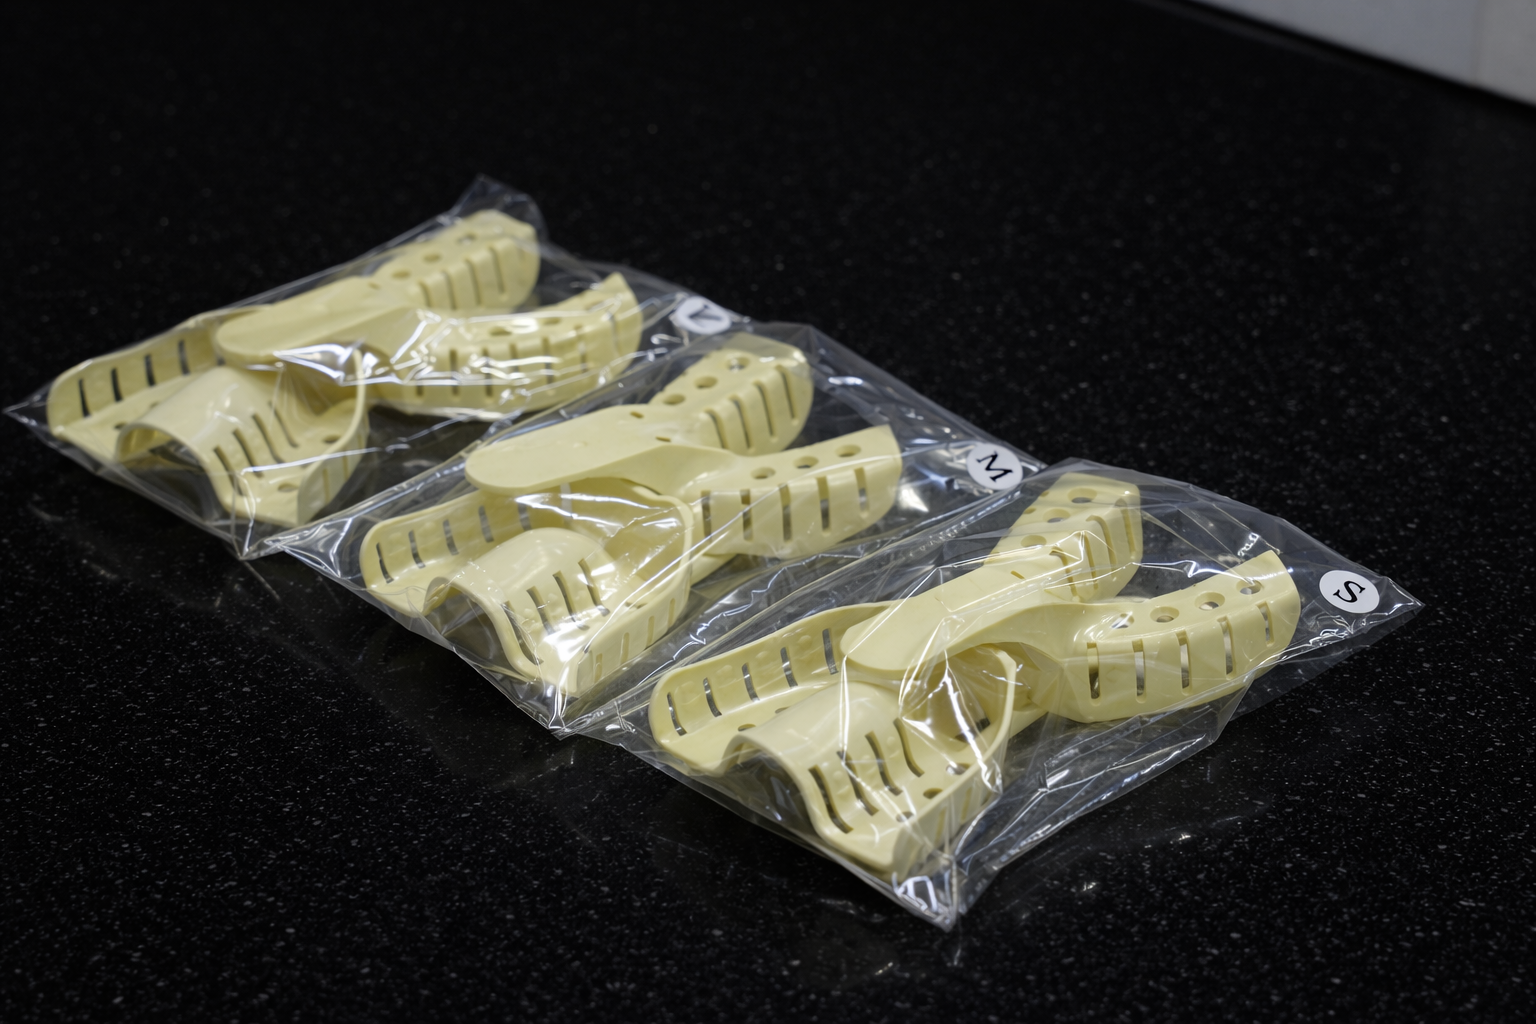
Try the small, medium, and large trays to find the most comfortable fit. The tray should cover your teeth without feeling too tight or too loose.
Step 3 — Mix the Impression Material
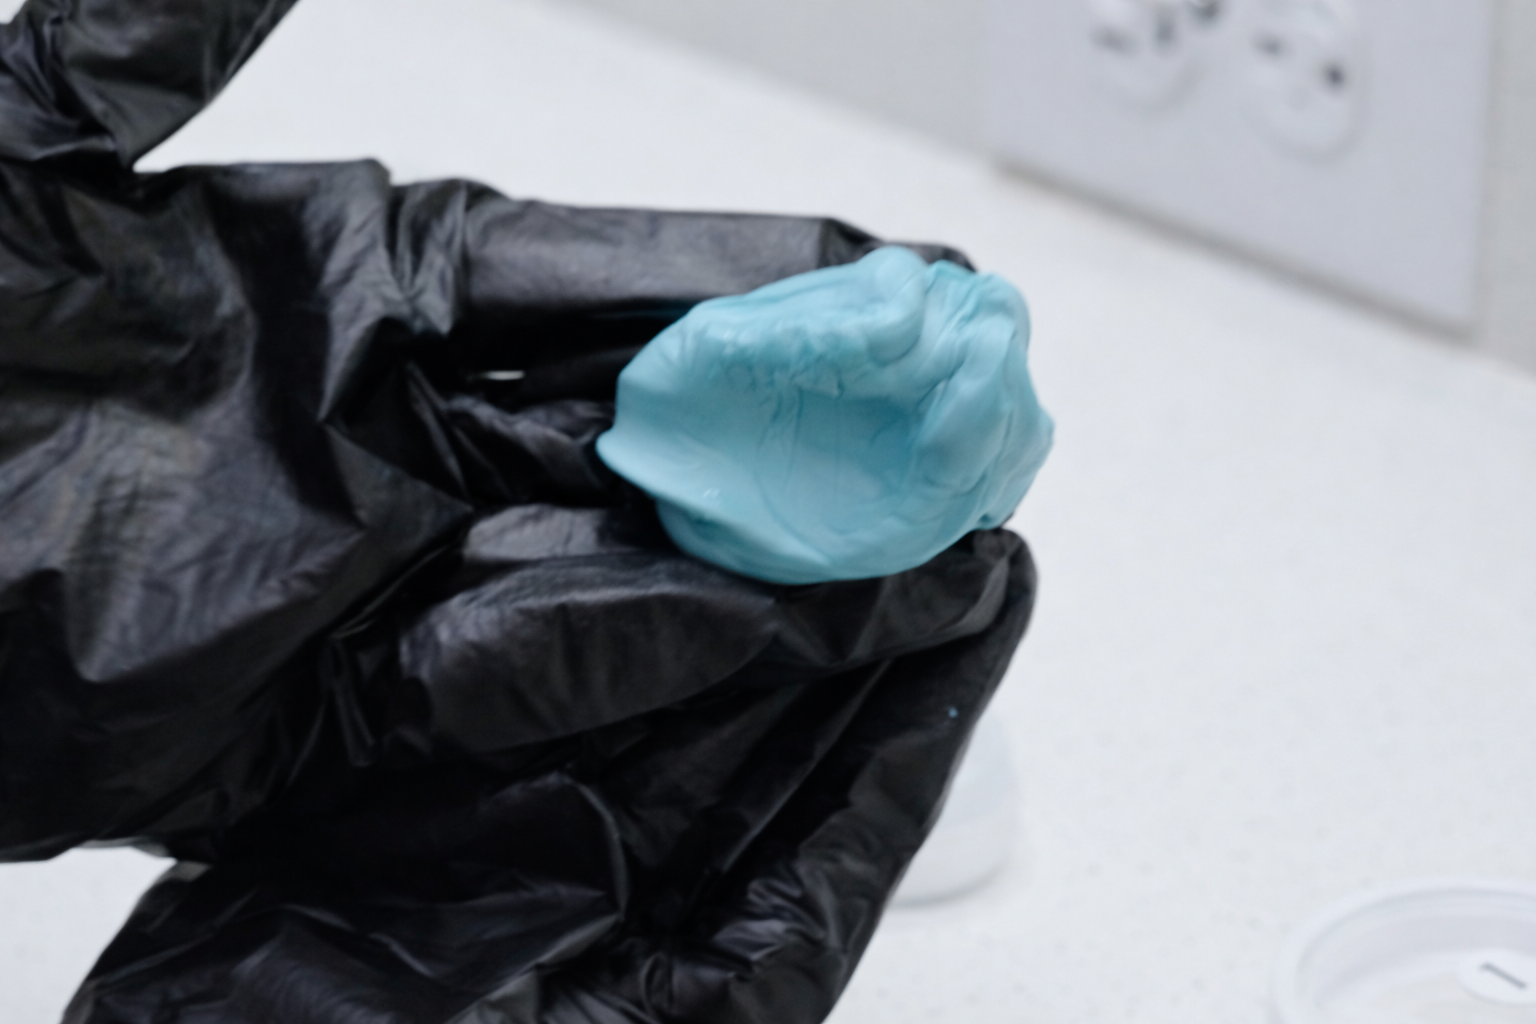
Mix one part base with one part catalyst until the putty becomes one solid, even color with no streaks.
Step 4 — Load the Tray Evenly
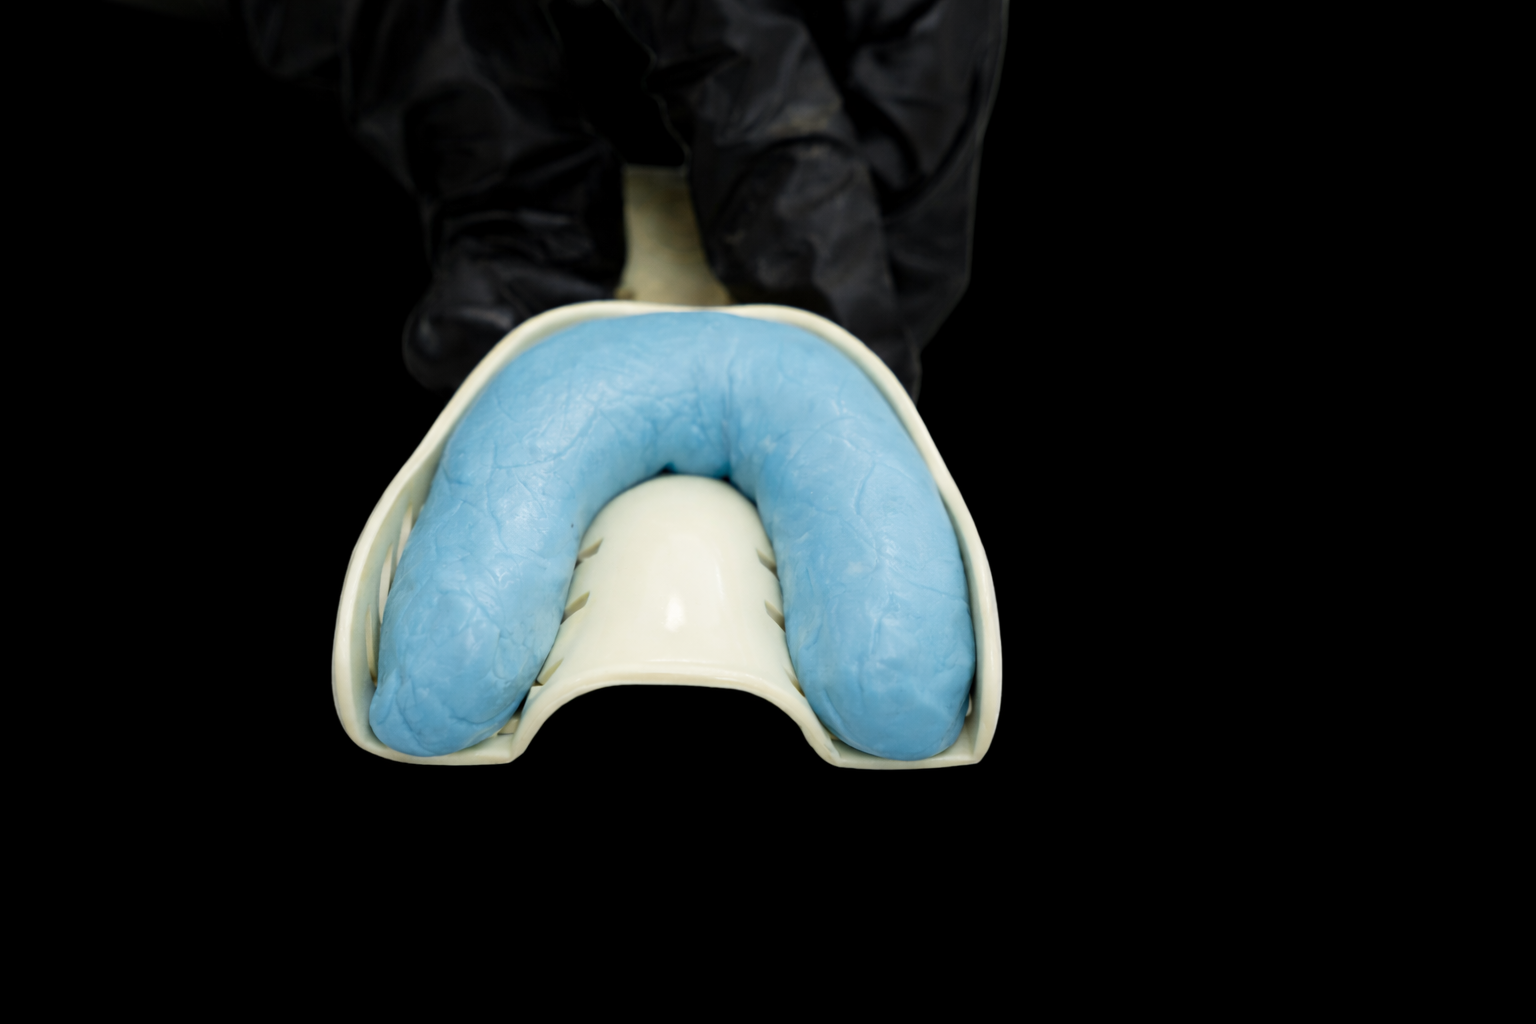
Press the mixed putty into the tray and spread it evenly so the tray is fully filled and smooth.
Step 5 — Take the Impression
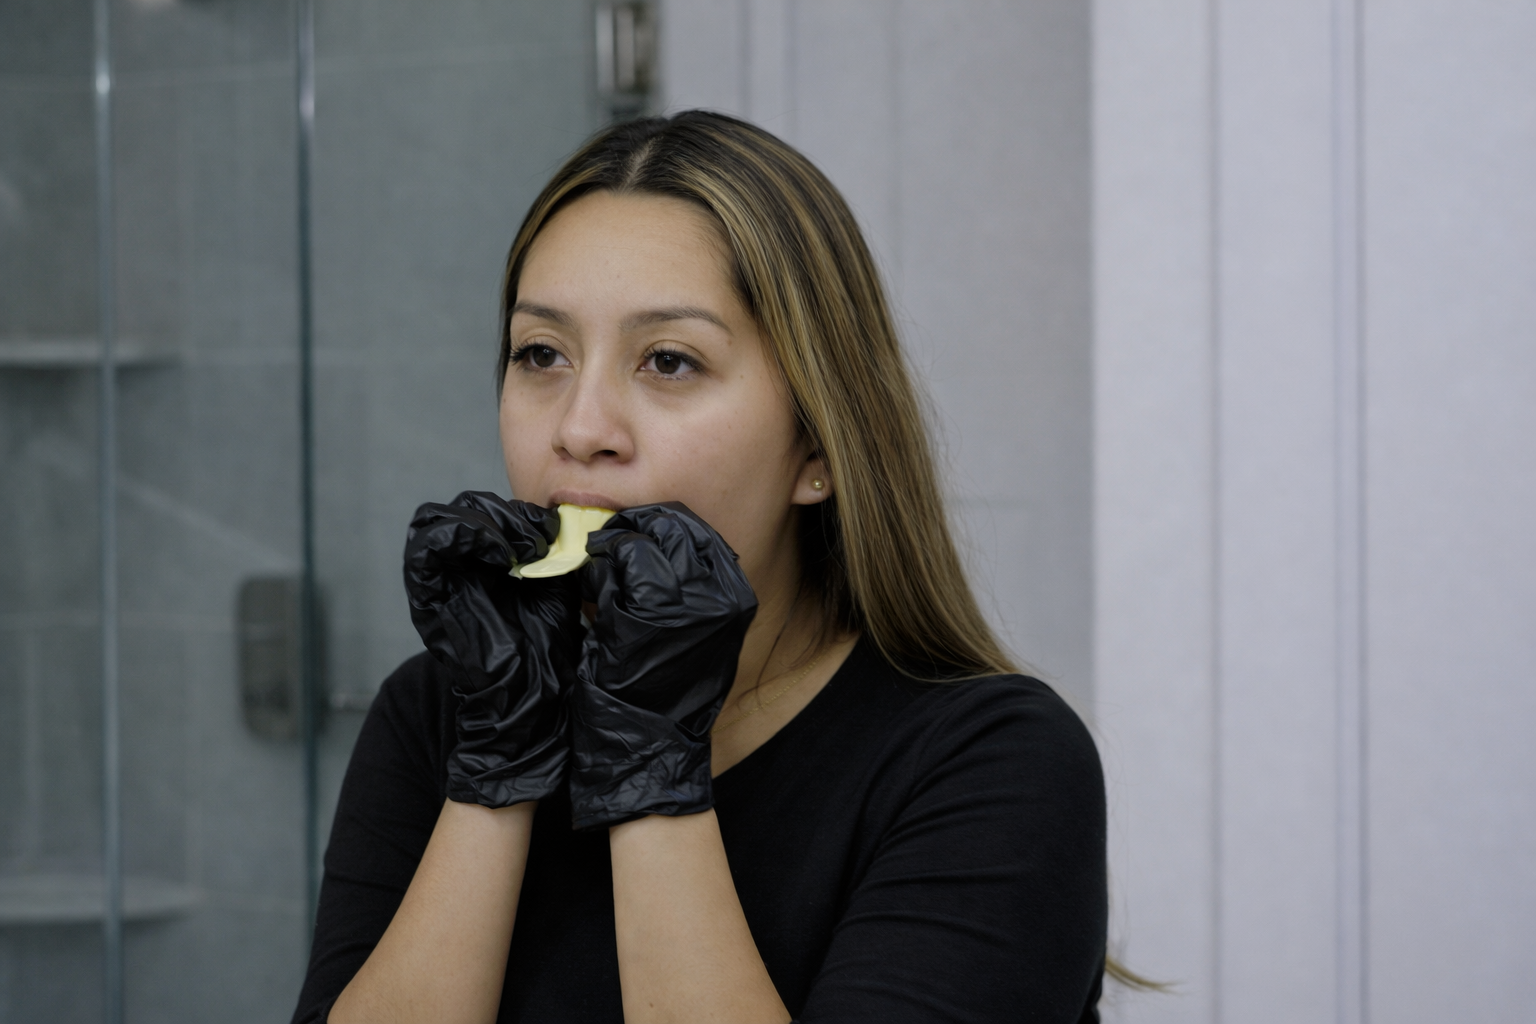
Place the tray in your mouth and press firmly so it seats evenly over your teeth. Hold still for 1–2 minutes while the material sets.
Step 6 — Remove and Check Your Impression
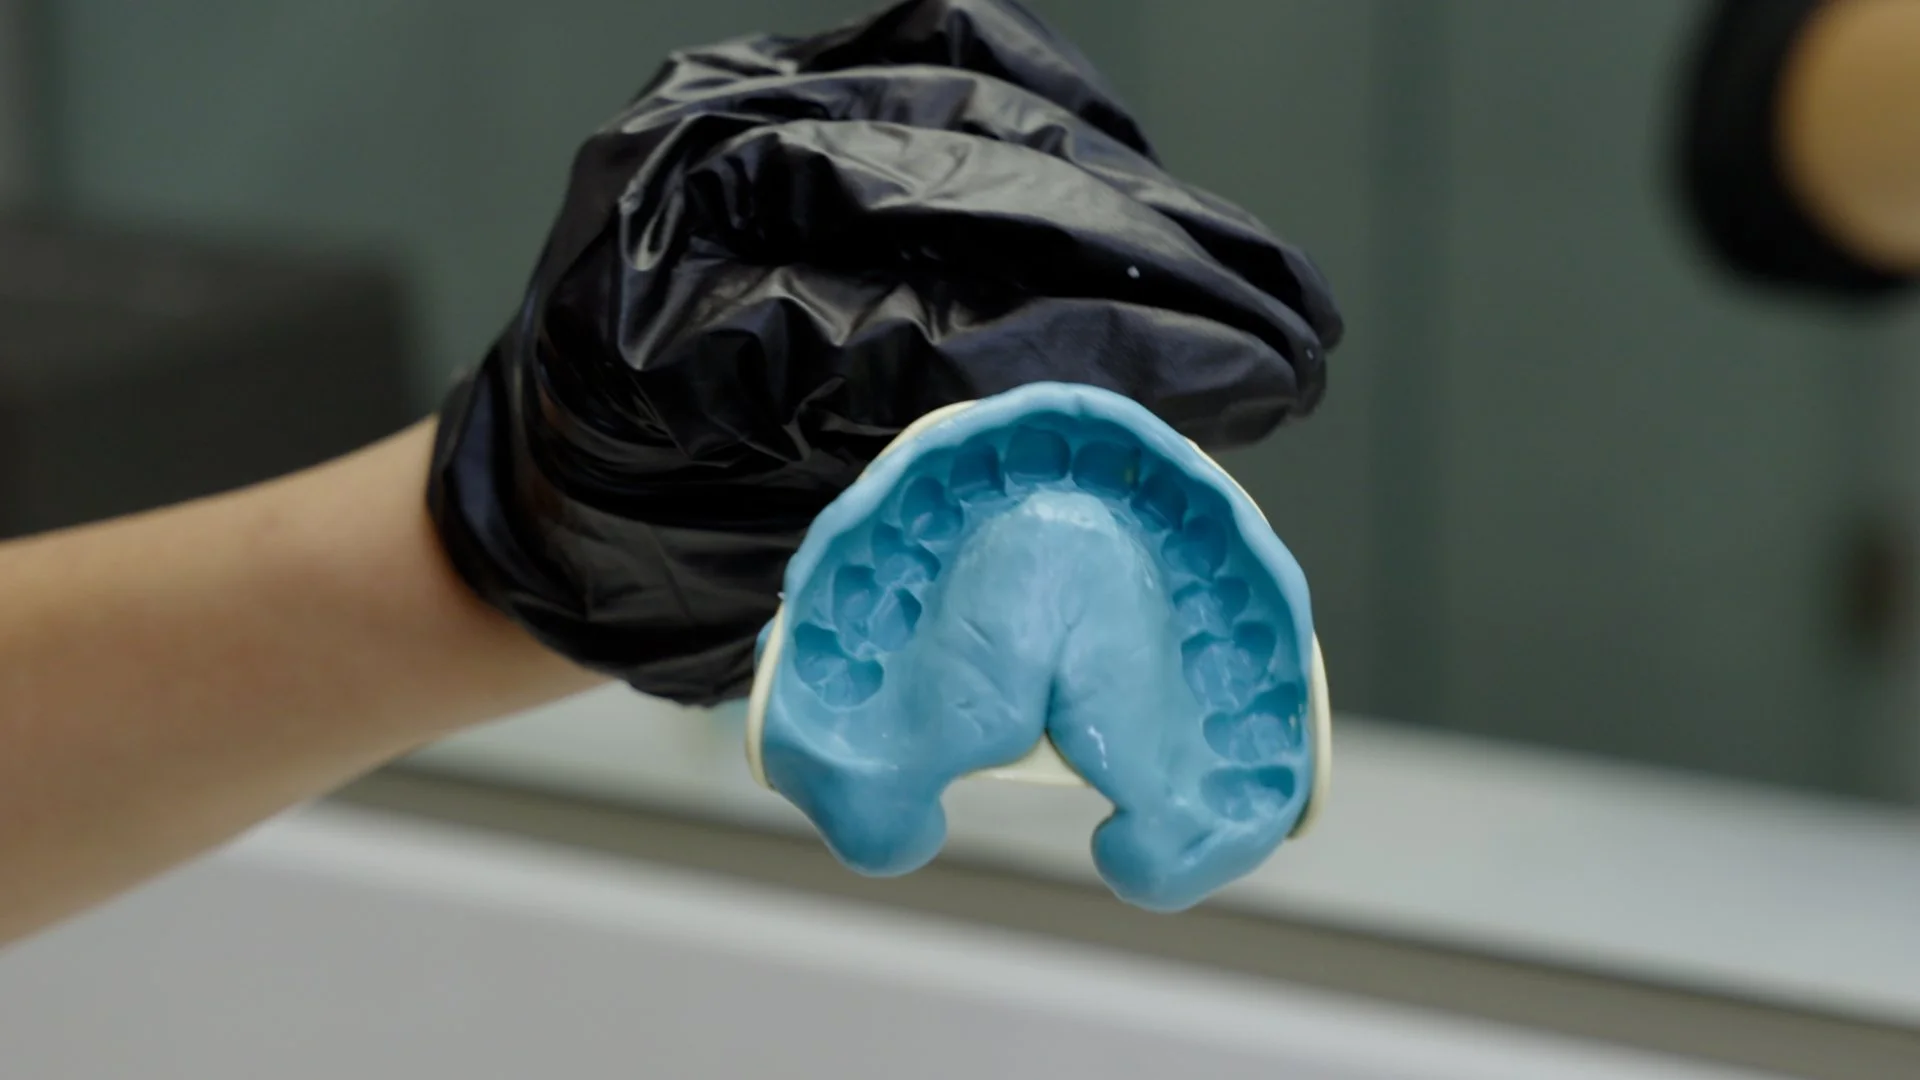
Remove the tray straight out. A good impression shows clear tooth detail with no major gaps, bubbles, or distortions. If it doesn’t look right, repeat using your extra material.
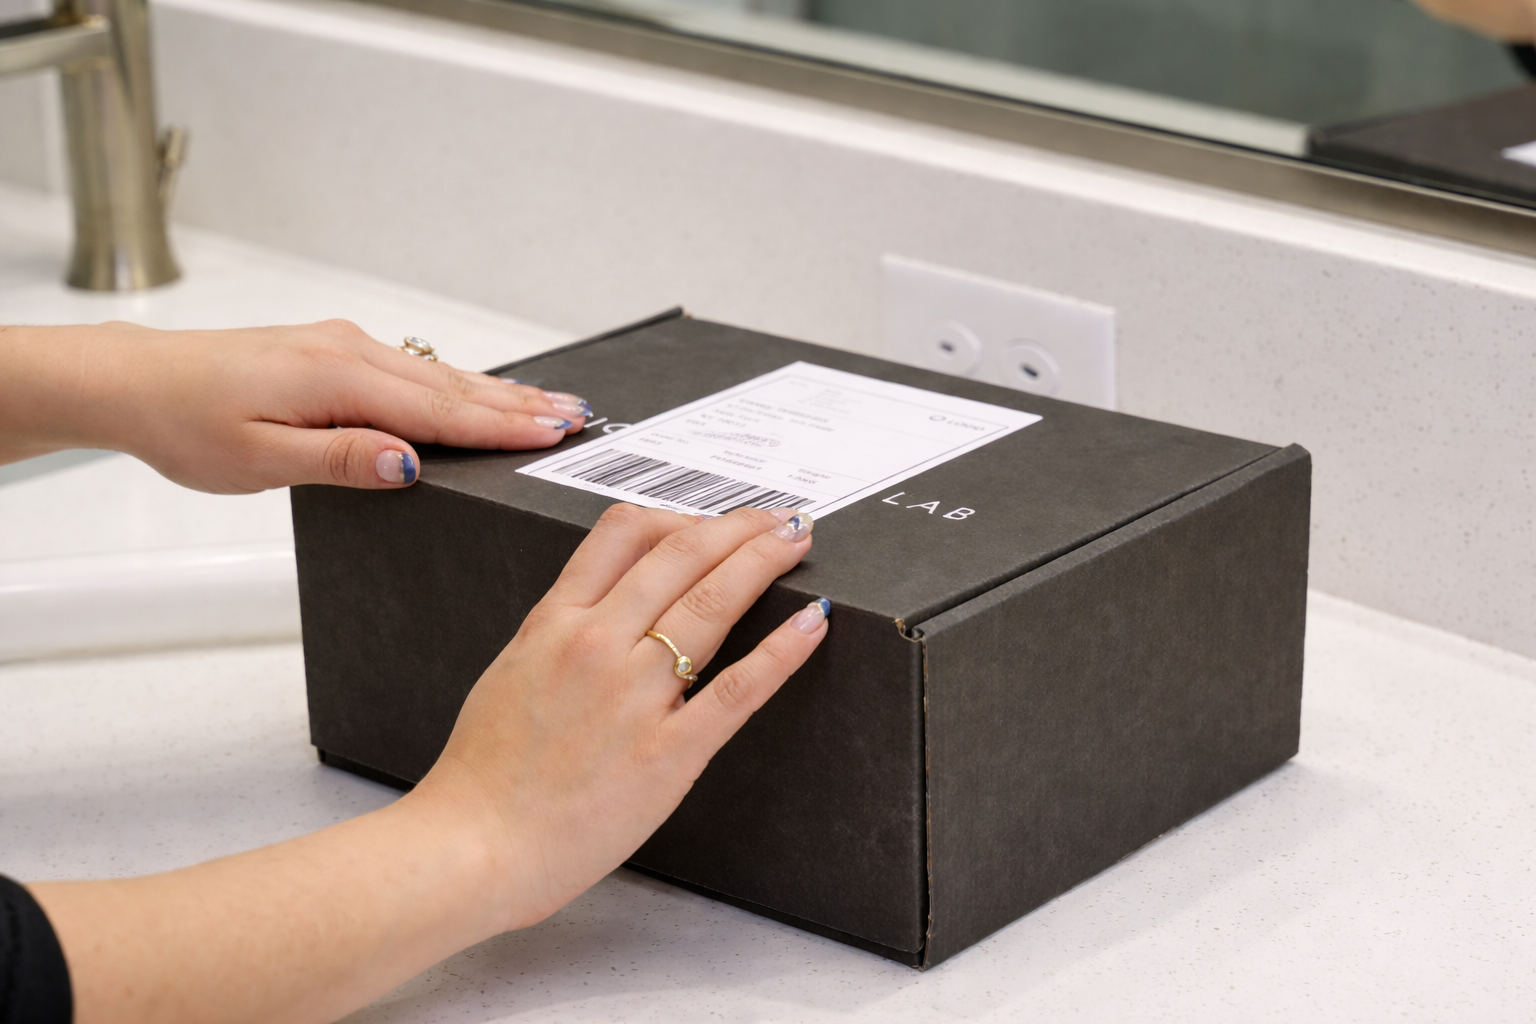
Step 7 — Package and Return
Place the finished impressions back into the provided packaging, seal everything securely, attach the return label, and send the box back to us