


Our Impression Kits
This page provides step-by-step instructions and helpful guidance for using our at-home dental impression kits, including what’s included in your kit and how to complete your impression accurately and confidently.

Watch the Full Impression Tutorial
Spanish Version

What’s Included in Your Impression Kit
-
Upper and Lower impression trays in Small, Medium, and Large
-
Latex-free gloves, selected based on your quiz preferences
-
Impression material (base and catalyst) for 4 attempts
-
Printed step-by-step instructions
-
Floss pick for comfort and tray removal
-
Clear return baggie for your completed impressions
-
Pre-paid return shipping label
Step 1 — Set Up Your Space
Wash your hands, lay out all kit contents on a clean surface, and put on the included latex-free gloves.


Step 2 — Choose the Best-Fitting Tray
Try the small, medium, and large trays to find the most comfortable fit. The tray should cover your teeth without feeling too tight or too loose.
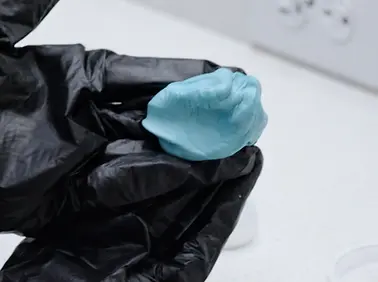
Step 3 — Mix the Impression Material
Mix one part base with one part catalyst until the putty becomes one solid, even color with no streaks.

Step 4 — Load the Tray Evenly
Press the mixed putty into the tray and spread it evenly so the tray is fully filled and smooth.
Step 5 — Take the Impression
Place the tray in your mouth and press firmly so it seats evenly over your teeth. Hold still for 1–2 minutes while the material sets.


Step 6 — Remove and Check Your Impression
Remove the tray straight out. A good impression shows clear tooth detail with no major gaps, bubbles, or distortions. If it doesn’t look right, repeat using your extra material.
Step 7 — Package and Return
Place the finished impressions back into the provided packaging, seal everything securely, attach the return label, and send the box back to us
